
Please come visit new home @ silkaburgoyne.com for my latest news and design. Simple click on the image above will bring you there. This site will be down by the end of the year! So update your bookmark and stay tune with me !!!
Please come visit new home @ silkaburgoyne.com for my latest news and design. Simple click on the image above will bring you there. This site will be down by the end of the year! So update your bookmark and stay tune with me !!!
0 Comments
 The pattern for my braided Top Tank/Tunic is available through the July Issue of Creative Knitting. This is a great first project for beginner who would like to venture out from knitting square. The major portion of this tank is work in a around using stockinette st in exception of the top body band and shoulder straps. The body band and shoulder straps are working in chunky braided cable and then attached to the main body piece. This will be a fun project for anyone who would like to explore cable knitting as well.
Size: S [M, L, 1X, 2X] Finished Measurement: Chest: 36 [40, 44, 48, 52] Gauge: 21 sts and 28 rows = 4"/10cm in stockinette st with the piece lightly pressed. Yarn: Summer Linen by Universal yarns [50% cotton, 50% linen; 126 yards per 50g skeins] Summer Linen is a great summer yarn for this project. If you would like to substitutes, choose a lite dk weight yarn. I would suggest Tahki Classic Cotton Lite, Panda Silk dk by Crystal palace or cotton Bamboo by classic elite. Happy Knitting! If anyone follows my blog, you will know that I am currently working on the new collection of purses. I have posted one of my purse design - Rufflely on the early post with the blog titled 'Purse, Purse, Purse'. I has just received news from Creative Knitting that the matching cardigan to the Rufflely purse will be featured in the Jan 2011 Issue of the magazine. So I would love to have actual purse sample done to go along with the cardigan publication date. I believe the magazine will come out in Nov 2010. With my friend, Annette, being my sample knitter, I have a swatch for my 2nd design. It is going to be a felted tote... yes oh yes.. I am going back to my felting root on this one. 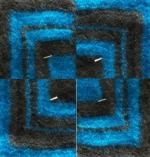 Center Motif The picture to the left provides a little preview on the main center motif for the tote... It's different tones of blue; turquoise and the deepest navy... no surprise for the color choices here... blue being one of my favourite color. I wanted to play with simple line and shape to create interesting visual effect... it's going to be bright and busy but I hope it's in a good way. With a little bit of imagination and playing with different combination of colors, this will be one fun tote to knit.
Stay tune for the actual sketch for this tote... still thinking a good name for it. It's friday, have a wonderful weekend everyone! 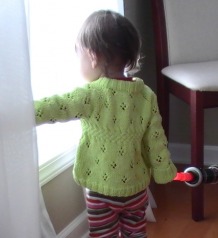 Just got an email from Interweave that my BabyDoll Cardi that features in this post will be included in the Interweave Weekend Issue which will be available later this year. It is a wonderful news for me because I love this cardigan and being published by Interweave definitely helps to expose my design to a large group of knitting community.
There are a lot of benefit from being published by a popular magazine, but one important thing to me is to force myself to sit down and actually write down my design pattern. I considered myself quite detail oriented but not very organize in term of my knitting design; I would have sketch, swatch, schematic, and note about the pattern all over the place. On the process of knitting my design, I would often make correction to my design note and when I finally finished knitting my project, I would be too lazy to wrote down the final corrected pattern. So being published definitely help me organized! There are people in my knitting group that have been asking for my Babydoll cardi pattern. I would have to tell them now to wait for the magazine publication. Really do hope that they won't mind. 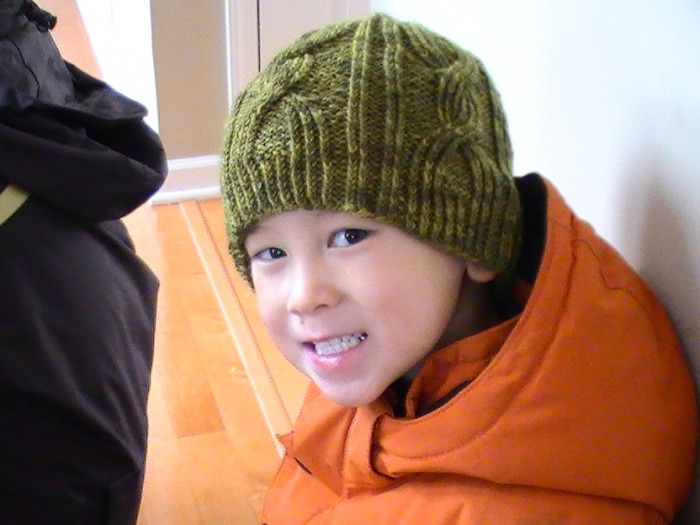 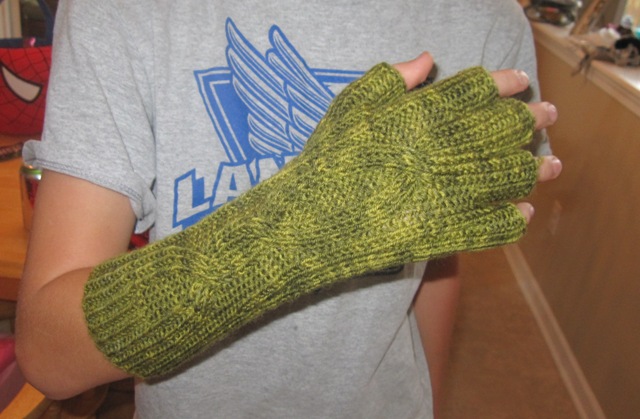  Things have been really crazy lately. It is March so it's time for another round of design submission to different magazines. I usually only submit designs for two publishers; however, keeping the submission deadline has been driving me crazy especially when I also have a project submission deadline for the magazine. With a full time job... a very active 16 months old.. and running around to get to kids' activities.. I put off the design until last minutes.. and now.. I have about 7 days left to get everything done... I need magic to get everything together.. God Help Me!!!!
Well.. enough for all the complaining... after all... I am the one to put myself into this situation. The good thing is that my project submission is going well and I have about 2 weeks to get the project finished. I have already completed the written patterns for both Beanie and Mittens and charts for the project, the beanie is completed and one mitten done... so only one more mitten to go and I am sure I can squeeze it in in 2 weeks. The project is called the Twist Cable Beanie and Mittens set for a magazine that will be published sometime this September.... Just in time for winter and holiday knitting. The above pictures were the sample set. My dear boy, Isaac and my nephew, David Edward, were gracious enough to be the models. The pictures above was the exact set that I used for the intial design submission and it was worked using Rustic Wool by Queensland Collection. LOVE rustic Wool, it's a dk weight yarn that provide very nice and soft texture. The color that this yarn offer is down right delicious. It is dk weight wool yarn, it's not bulky, it's warm and it feels great against the skin. I can't say enough about this beautiful yarn. The project submssion that I am working on is worked in Rustic Tweed by Queensland Collection. It is very similar to rustic wool: dk weight, soft texture, nice color selection and fantastic to work with. It comes in 100g skein with 278 yards. A good quality yarn with a good price. I am loving these two yarns and I already have a few projects in mind that I can certainly utilizes them. As for my schedule for the next 7 days, a lot of sketching (glad that I have some done), yarn selection, knitting swatches and prepared for the submission package.... very busy but yet enjoyable... let's hope that everything will get done on time! Hello Everyone! It's Chinese New Year today and also Valentine's Day so everyone should have a reason to celebrate. This is the year of Tiger and in a way it's my year because I am indeed born in the year of Tiger. A person born under the sign of tiger are rather agressive and sturbborn. Hmmm.. I do agree I am sturbborn but not so agressive. But who cares.. It's the new year! Today I am attending a chinese new year gathering at my friend house so I bring out my baking and cooking goddess in me and spend most of my morning baking and cooking.. I still have a long way to go but I figure sitting down and update my blog and share some pictures of my cooking is a way to relax.. so here is some pictures of my cooking. Enjoy!     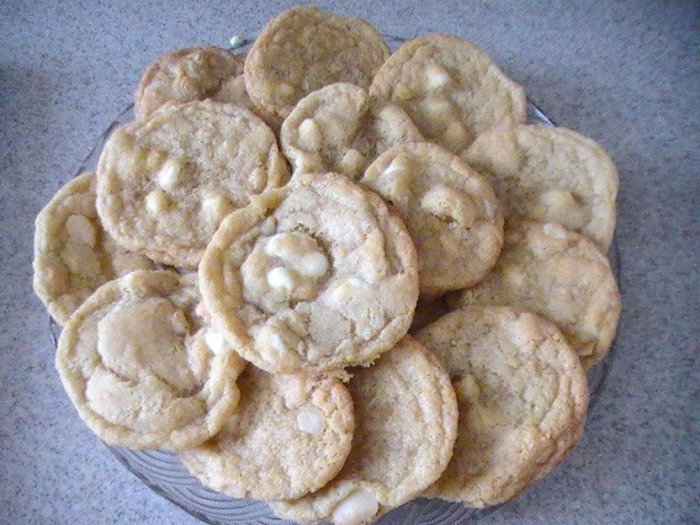      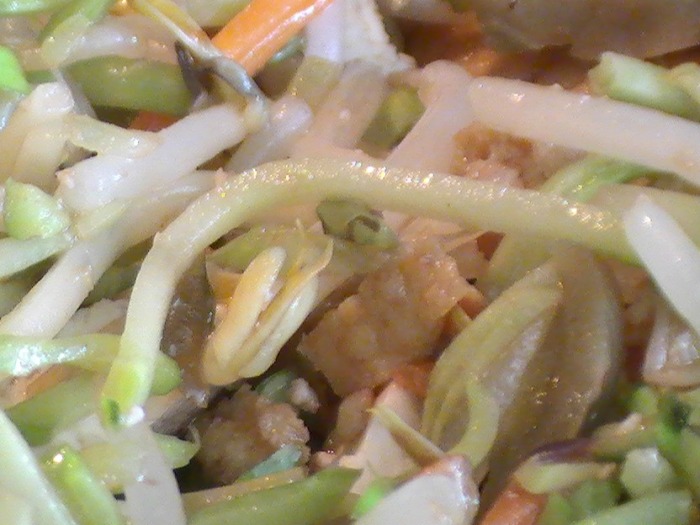  As I was reading the pattern from the Creative Knitting March 2010 Issue. I realized that the decrease from from body ribbing to main body need a little bit more explanation. It is mainly my fault for not putting a clear instruction on the pattern. In the magazine, it mentioned to decreaes 4 sts evenly for the body back and 2 sts for the body front while working on the row 1 of cable pattern. If you are more experience knitter, this is easily accomplished to work the dec when working on the pattern; however, it might get a little tricky. Hence I have put 2 other way of doing the decrease in this post.
There is 2 ways to work the decrease from body ribbing to main body: 1) When working on the last row of the ribbing (WS) descrease 4 sts evenly for the body back ribbing and 2 each for both front ribbing. 2) On the next RS row after ribbing, instead of working in cabled fabric pattern, work in stocknette st instead for first 2 rows and work decrease on first RS row. Start working on Row 1 of Cable Fabric pattern on 3rd row. If anyone has any question regarding this pattern, please feel free to contact me! 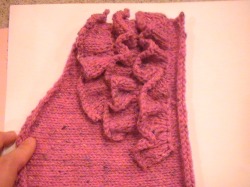 A lot of my friends asked me why I don't design and make purses anymore. The truth is that, it's the matter of time and this year, I will and I am working on a new collection of purse. I recently put my 1st collection of purses into a eBook and it is available to purchase via Ravelry.com and my Etsy store.
My last collection is all felted purse and it was about 2 years ago and the new collection that I am working on is actually more knitting then felting. I wanted to concentrate on one single element to each purse; whether is ruffles, beading detail, giant cable or maddness of color. The swatch in picture is one of my many designs. The inspiration of this purse is actually driven by one of my cardigan/pullover sketch, the cardi features ruffles in different length on both side of the body front and I wanted to use the same ruffle concept on my purse. The purse will features 2 set of 3 uneven length ruffles with a center belt buckle. I choices a merino and silk blend tweed yarn in DK weight. The merino provide the softness that I need for the ruffles and tweed tones provide a little depth and tones down the 'girly-ness' from the ruffles. The purse will work from side to side in stockinette stitch with short row for side shaping. I am still on the process of choosing the handles and buckle and all the finishing touches of the purse. As of right now by looking at the swatch, I am liking what I am seeing. I will keep updating my progess of my purse collection.. so keep coming in and provide any comment suggestion you might have! I knitted my very first pair of socks using 5 dpn, the traditional way to knit socks. Although the socks came out great for a first timer in socks knitting; however, I wanted to have an easier way to knit socks. Then a year ago, I heard about people talking about the Magical Loop method, I also heard people saying about knitting a pair of socks using 2 circular needles. I wasn't sure how I felt about the magical loop method when I first heard it... but since handknitted socks are in everyone wish list for the holiday, I was willing to try different method to knit socks faster. I finally did some research on the magical loop method and try it. And I totally love it. Since mastering the skill, I have knitted more than 10 pairs of socks and I also using magical loop method method for fingerless mitten, gloves and hat. Since most of the socks patterns are written in 5 dpn, so I converted a basic sock pattern to use the magic loop method. I have so much fun knitting socks and mittens, I have started designing pattern for socks and gloves for using this method.
To see whether the magical loop is a better method than 5 dpn, I have tested in a seasoned knitter, my mother. She have been knitting for more than 40 years. She knitted everything using dpn and she believes it's easier to use dpn to knit in the round. When I taught her the magical loop method, she hesitated. She tried the first pair of gloves using magic loop, and when the gloves was finished, she absolutely loves the new way. I figured if I can change my mother's mind, then the magic loop method is indeed a good alternative to dpn for socks, mitten etc... In case anyone who is not familiar with the magic loop method, a magic loop is actually a long circular needle with very flexible wire. Following is the instruction of the magic loop method: 1. Cast on an even number of stitches and slide stitches to middle of cable. 2. Divide stitches in half and pull cable loop out between two groups of stitches 3. Slide stitches down to their respective needle tips. you will have half of your stitches on each needle tip. Hold needle tips parallel and pointing to right, working yarn will hang from back stitches. Place a market on the front group of stitches to mark the begining of the round. 4. Pull back needle tip out until you have enough cable to allow you to work stitches on front needle. 5. Work all stitches on front needle, being careful not to twist. 6. Slide two groups of stitches back to their respective needle tips. Repeat step 4 as many times as needed. The magic loop method might seem a little bit difficult at first, but once you get used to the needle pulling back and forth. It is going to be a good alternative to dpn to work a small circle. 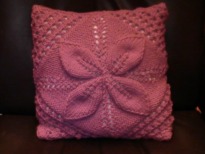 I always have a few projects to put aside for myself to work on when 1. I have a mind block during design submission; 2. when I am sitting in front of the TV with a sleeping baby in my arms; 3. Try to use some of my yarn stash; 4. To finish some straight forward projects such as socks for my nephew for the next holidays or some simple project that I can work on without referring to pattern all the time. The above cushion I started a couple weeks ago while I was looking through my magazine and pattern book to get inspiration for my upcoming submission. As I was flipping through Nicky Epstein's 'Knitting never felt better', I saw this pattern and I thought it would look nice as a cushion cover. The front cover is made in 4 identical pieces and sew together; as for the back, it is made in 2 separate pieces by picking up stitches from both end. The 2 back pieces are overlapped in the middle to create a little opening for easy cushion insert. I use a rather simple motif for the back cover, it's a combination of stockinette stitch with a row of eyelet. I have included a picture of the back cover. Since the pictures were taking in different time; hence, the color seems quite different even they are the exact same color. I am on the process of dropping down the pattern and will publish it once it is available. 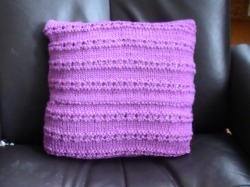 | Feature Item
Kaleido Purse Vol. 1 is now available at Ravelry.com and my Etsy Store for $12.00. Feature 5 felted purse patterns.
 CategoriesAll ArchivesJuly 2010 Author
Kaleido aka Silka aka Silkie is a mother of three young children with a full time job who enjoys knitting and designing. She spends most her free time (if any) knitting.
Silkie lives in MI with her lovely and supportive husband, her children and her fashionable 80 something years old mother-in-law.  |
 RSS Feed